This KB is pulled directly from Mimecast KB:
https://mimecastsupport.zendesk.com/hc/en-us/articles/34000358773523-Connect-Process-Microsoft-365-Mail-Lockdown
This article provides guidance on enhancing security by configuring Microsoft 365 to accept inbound emails only from Mimecast IP addresses through the creation of a receive connector. This process entails setting up a connector in the Microsoft 365 Exchange Admin Console, designating Mimecast as the partner organization, and implementing security restrictions to ensure that emails are transmitted over TLS and originate from specified IP ranges.
Configuring Microsoft 365 Mail Lockdown
You can lock down your firewall, by using the following steps:
1. Log in to the Microsoft 365 Exchange Admin Console.
2. Click on the Mail flow menu item.
3. Click on the Connectors tab. Your connectors are displayed.
4. Click on + Add a Connector.

5. Under Connection from, choose Partner Organization.
6. Click the Next button.
7. Change the connector's name to Mimecast to Microsoft 365.
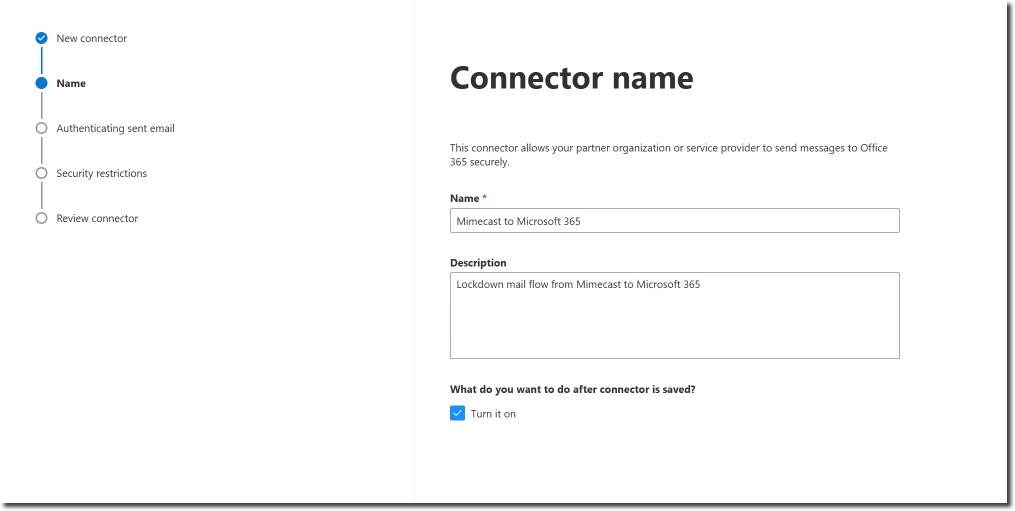
8. Click the Next button.
9. Choose By verifying that the sender domain matches one of the following domains and add a * to capture all the inbound domains.
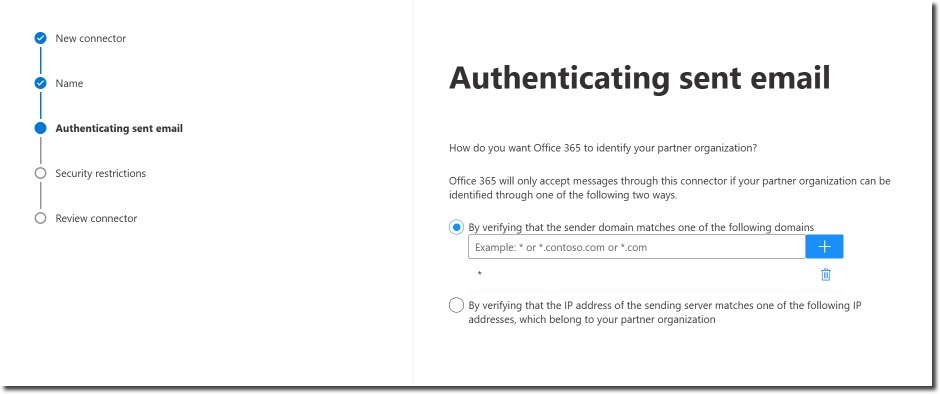
10. Click the Next button.
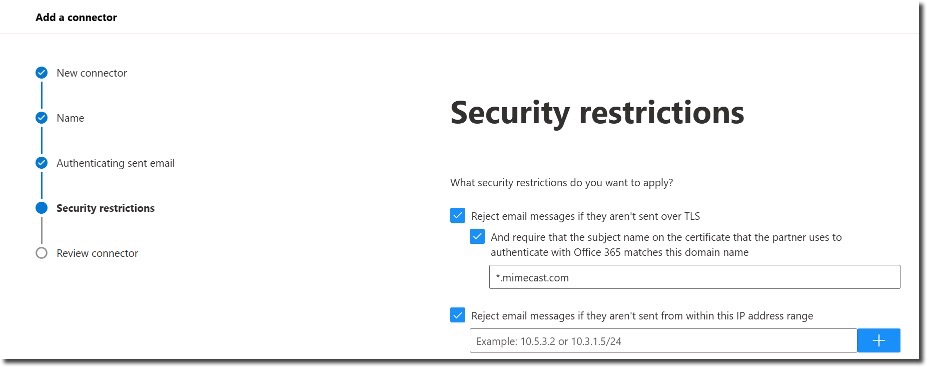
11. On the Security Restrictions screen:
Check the check box for Reject email messages if they aren't sent over TLS.
Check the the check box for And require that the subject name on the certificate that the partner uses to authenticate with Office 365 matches this domain name. Enter *.mimecast.com into the field below the checkbox.
12. Check the check box for Reject email messages if they aren't sent from within this IP address range, and provide the IP address range:
63.128.21.0/24
170.10.128.0/24
170.10.129.0/24
170.10.130.0/24
170.10.131.0/24
170.10.132.0/24
170.10.133.0/24
207.211.31.0/25
207.211.30.0/24
205.139.110.0/24
205.139.111.0/24
216.205.24.0/24
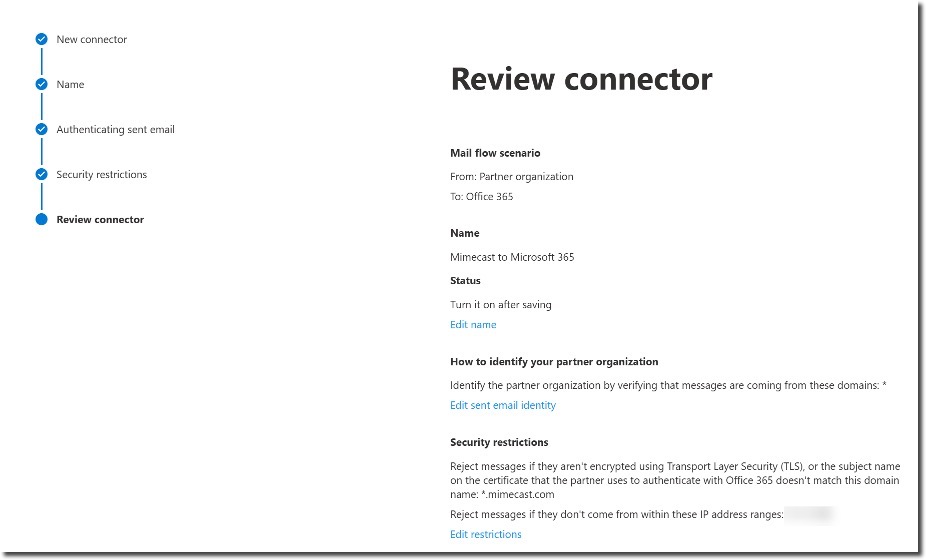
- Click the Next button.
- Review the settings you have configured, and click Create connector.
Hien T
Comments